
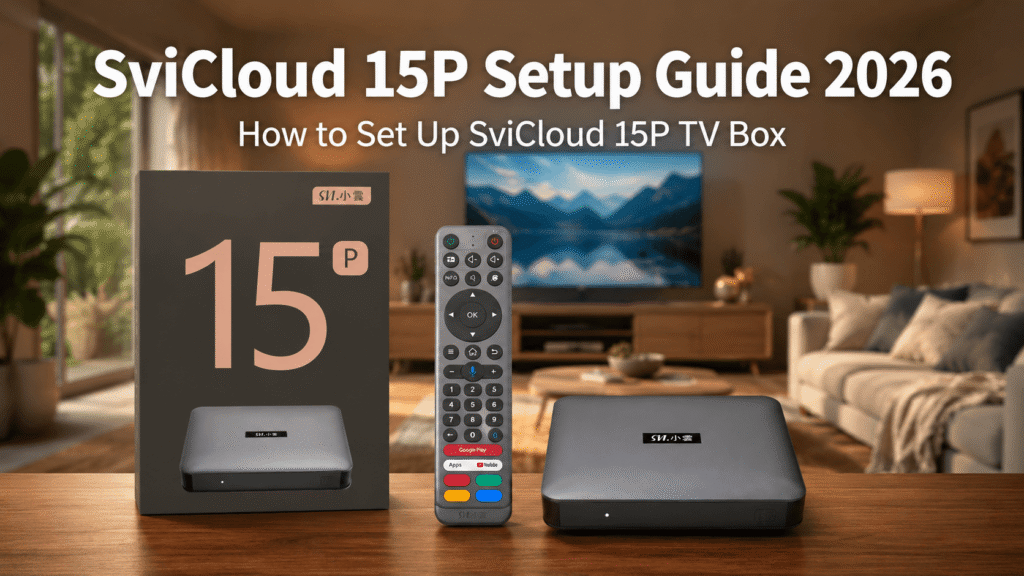
Setting up the SviCloud 15P TV Box is simple, even if this is your first SviCloud device. This SviCloud 15P Setup Guide explains how to set up the SviCloud 15P TV Box from start to finish, including HDMI connection, power setup, remote pairing, WiFi connection, and the basic first-time settings.
The SviCloud 15P runs Android 14 and supports Wi-Fi 6, dual-band 2.4 GHz and 5 GHz WiFi, Ethernet, Bluetooth 5.4, and an AI voice air-mouse remote. If you want to check the full specifications, package details, and current availability, visit the 小雲盒子 15P 電視盒 product page.
Once the basic connections are complete, most users can finish the initial SviCloud 15P setup in just a few steps.
⚡ Quick SviCloud 15P Setup Guide
For most users, the SviCloud 15P setup follows these steps:
- Connect the SviCloud 15P to your TV with HDMI.
- Connect the power adapter.
- Select the correct HDMI input on your TV.
- Choose your preferred language.
- Pair the Bluetooth remote if prompted.
- Set your time and time zone.
- Connect to WiFi or Ethernet.
- Complete the remaining on-screen setup.
- Enter the SviCloud home screen.
If you have used an older SviCloud or XiaoYun TV Box, the process should feel familiar. If you are still comparing models, you can also browse the complete SviCloud TV Box lineup.
📦 1. What Comes With the SviCloud 15P TV Box?
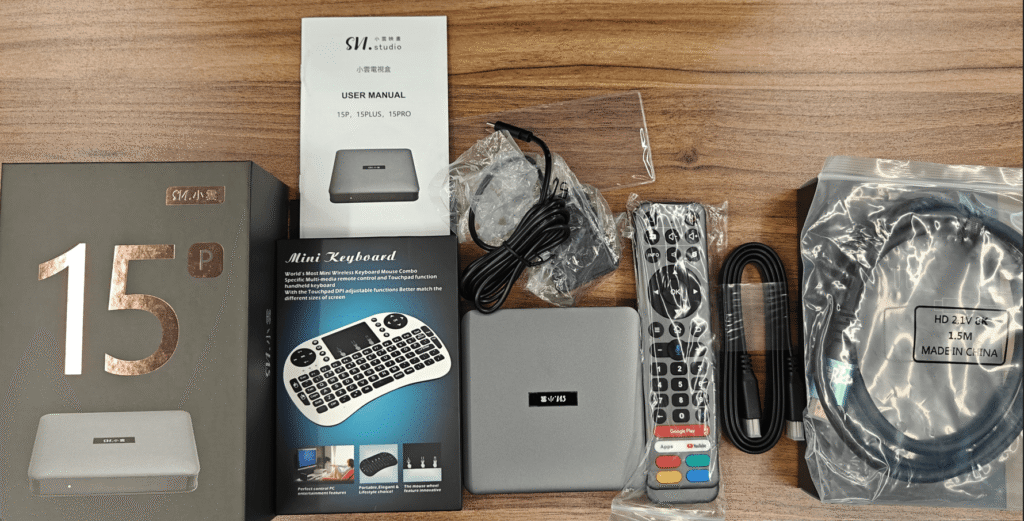
Before starting the SviCloud 15P installation, make sure you have the main accessories ready:
- 小雲盒子 15P 電視盒
- Bluetooth AI voice remote
- Power adapter
- HDMI cable
- User guide
Place the TV box near your television where the HDMI and power cables can reach comfortably.
🔌 2. How to Connect SviCloud 15P to Your TV With HDMI
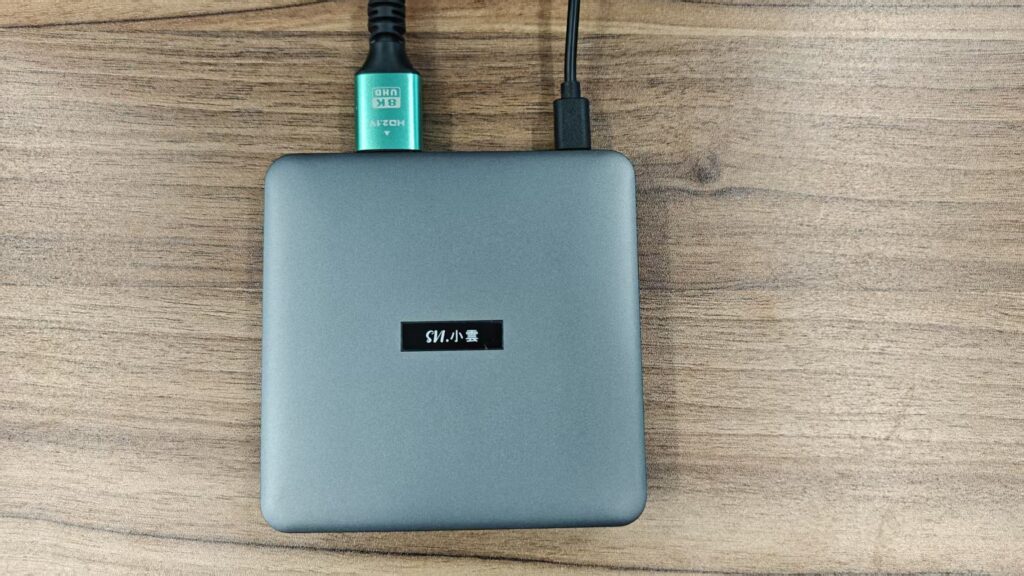
Connect one end of the HDMI cable to the SviCloud 15P TV Box and the other end to an available HDMI input on your television.
For example:
SviCloud 15P → HDMI Cable → HDMI 1
Remember which HDMI port you use because you will need to select the same input on your TV. This completes the basic SviCloud 15P HDMI setup.
🔋 3. How to Power On the SviCloud 15P TV Box
Connect the supplied power adapter to the SviCloud 15P TV Box and plug it into a wall outlet.
The SviCloud 15P uses a Type-C power connection. Once power is connected, the device should begin its startup process.
✅ For reliable operation, use the supplied power adapter rather than an unknown third-party charger.
📺 4. SviCloud 15P No Signal? Check Your HDMI Input
If the SviCloud 15P is powered on but your TV displays No Signal, use the television remote and press:
- Input
- Source
- TV/AV
Then choose the HDMI port connected to the SviCloud 15P.
For example, if you connected the box to HDMI 2, select HDMI 2. If the SviCloud 15P no signal problem continues, check the HDMI cable, power connection or try another HDMI port.
🌐 5. Choose Your Language and Basic Settings
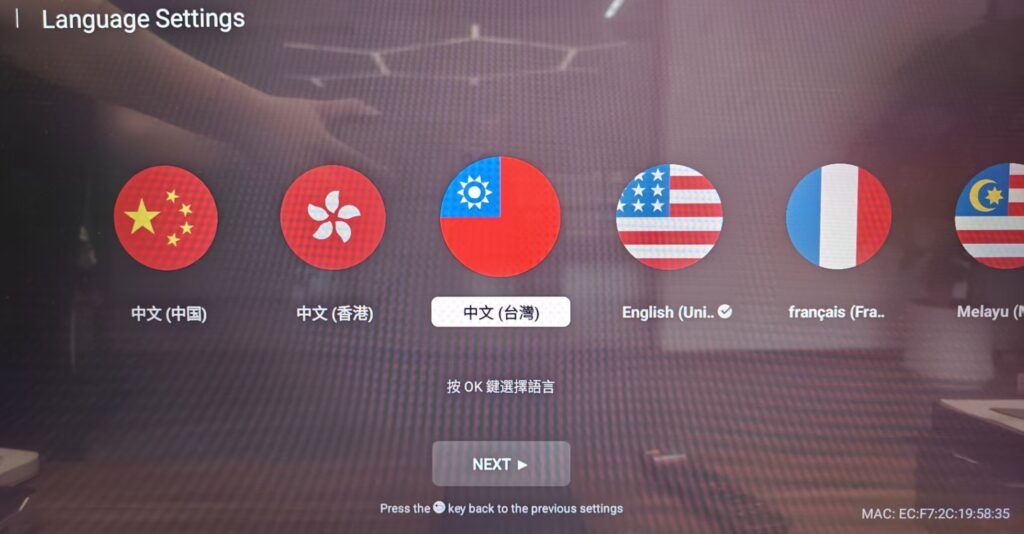
When the SviCloud 15P startup screen appears, select your preferred language and follow the on-screen instructions.
You may also be asked to confirm:
- Time zone
- Date and time
- 地區
- Other basic Android settings
The exact wording may change with different SviCloud 15P firmware versions.
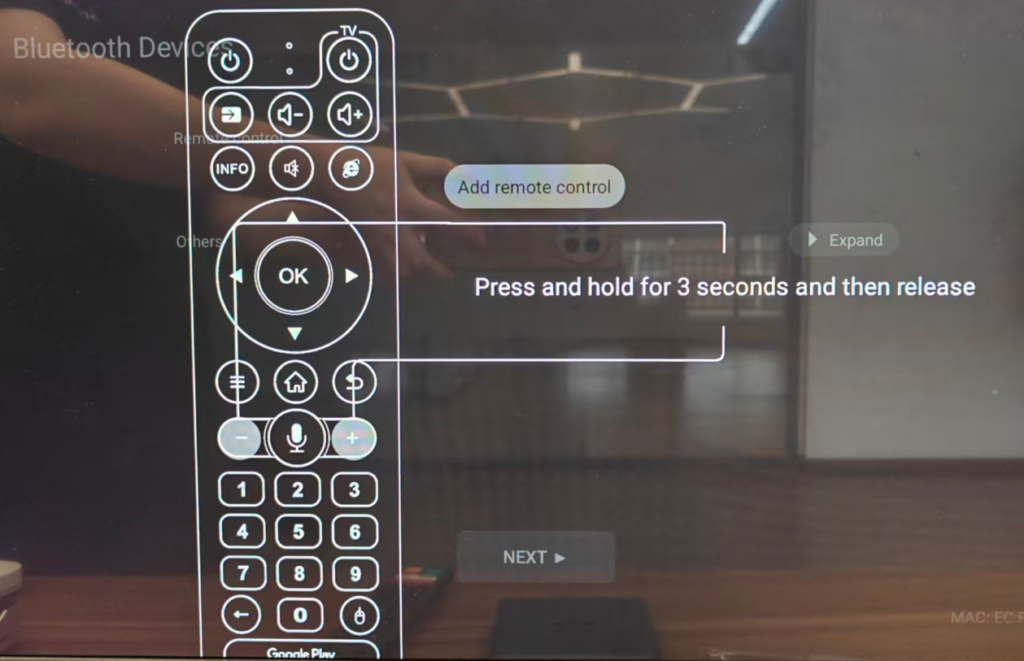
🎛️ 6. How to Pair the SviCloud 15P Remote
The SviCloud 15P TV Box includes a Bluetooth AI voice remote with air-mouse functionality. If Bluetooth pairing is requested during setup, keep the remote close to the TV box and follow the instructions displayed on screen.
Recent SviCloud remotes may use a combination such as holding VOL- and VOL+ together to start pairing. If your SviCloud 15P shows a different button combination, follow the instructions on your TV.
After completing the SviCloud 15P remote pairing, test the:
- Direction buttons
- OK button
- Home and Back buttons
- Volume controls
- Voice button
- Air mouse
Bluetooth pairing is especially important for voice-control functions.
📶 7. SviCloud 15P WiFi Setup: How to Connect to WiFi
The SviCloud 15P TV Box supports WiFi 6 and both 2.4GHz and 5GHz wireless networks.
To complete the SviCloud 15P WiFi setup:
- Open the WiFi or Network option.
- Select your home WiFi network.
- Enter your WiFi password.
- Select Connect.
- Wait for the connection confirmation.
Once connected, the SviCloud 15P can access compatible online apps and services.
SviCloud 15P 2.4GHz vs 5GHz WiFi
Which WiFi band should you use?
- Choose 5GHz if the SviCloud 15P is relatively close to your router and you want faster wireless performance.
- Choose 2.4GHz if the TV box is farther away or the signal needs to pass through several walls.
Since the SviCloud 15P TV Box supports WiFi 6, users with a compatible WiFi 6 router can also take advantage of the newer wireless standard.
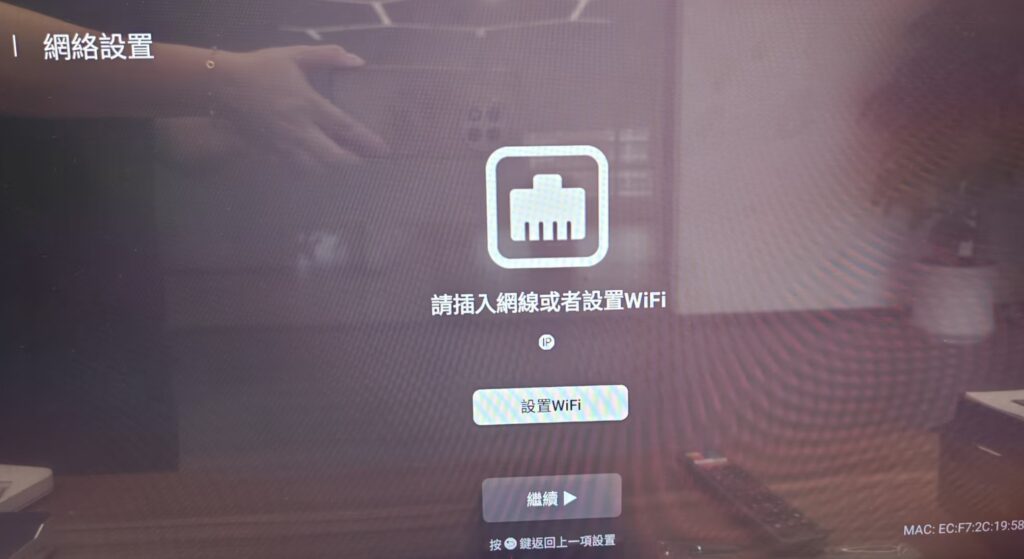
🔗 8. How to Connect SviCloud 15P to Ethernet
The SviCloud 15P TV Box also supports a wired Ethernet connection. Simply connect an Ethernet cable between your router and the SviCloud 15P. The network should normally be detected automatically.
Ethernet can be useful when:
- WiFi reception is weak
- Your router is close to the TV
- You want a more consistent wired connection
Normally, you do not need to use Ethernet and WiFi simultaneously.
✅ 9. Finish the SviCloud 15P First-Time Setup
Once the remote, language, and internet connection are configured, continue through the remaining setup screens. Select Continue, Finish, Done, or the equivalent option shown by your firmware. The SviCloud 15P TV Box should then enter its main home screen.
From there, you can begin configuring:
- 應用程式
- Bluetooth accessories
- Voice control
- Display preferences
- Screen mirroring
- Local media
At this point, the main SviCloud 15P setup is complete.
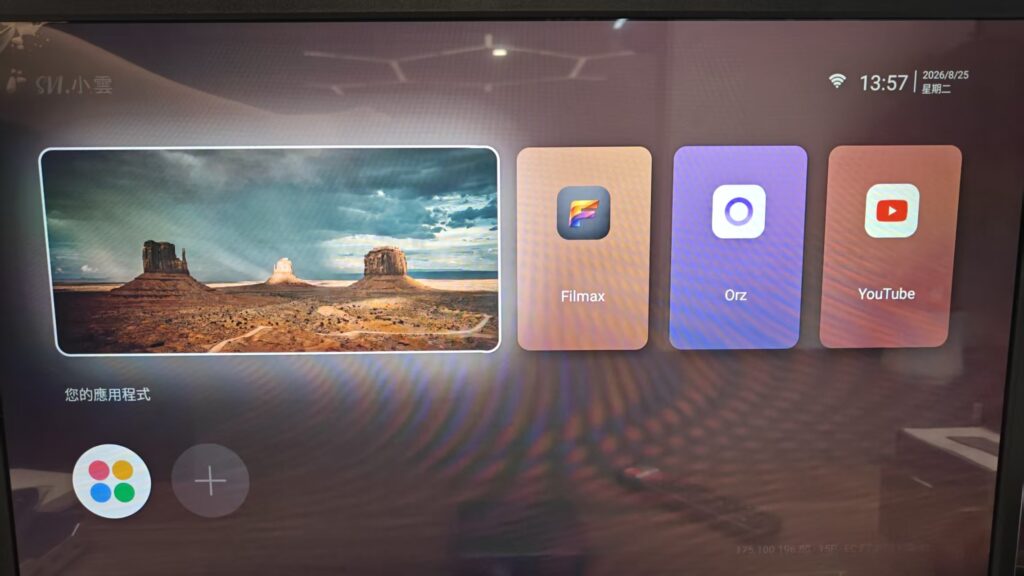
🎤 10. Apps, Voice Control and Screen Mirroring
Once connected to the internet, you can begin organizing compatible apps on the SviCloud 15P TV Box.
App availability may vary by region, provider, account, and firmware version, so only install applications you trust and are permitted to use.
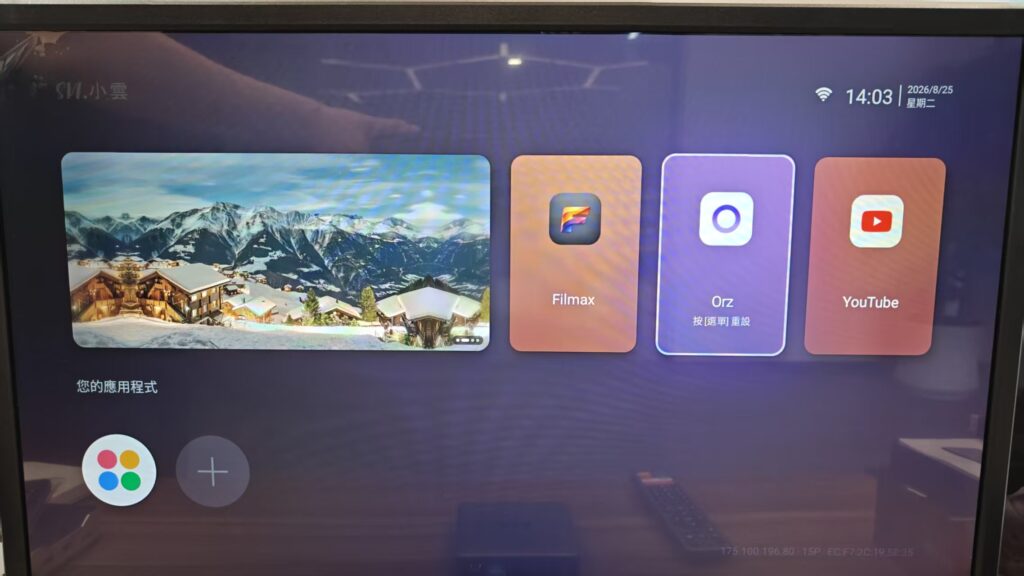
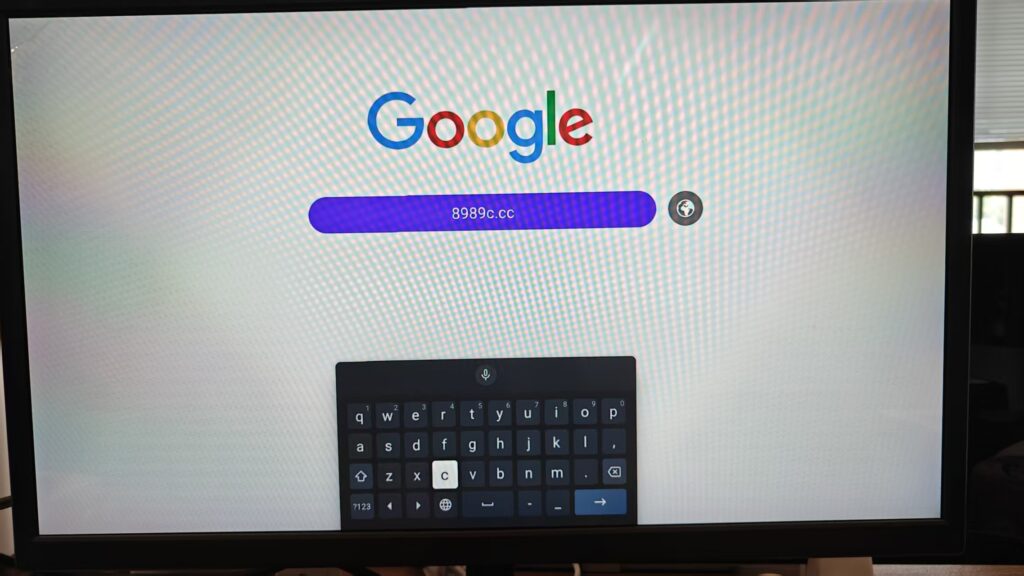
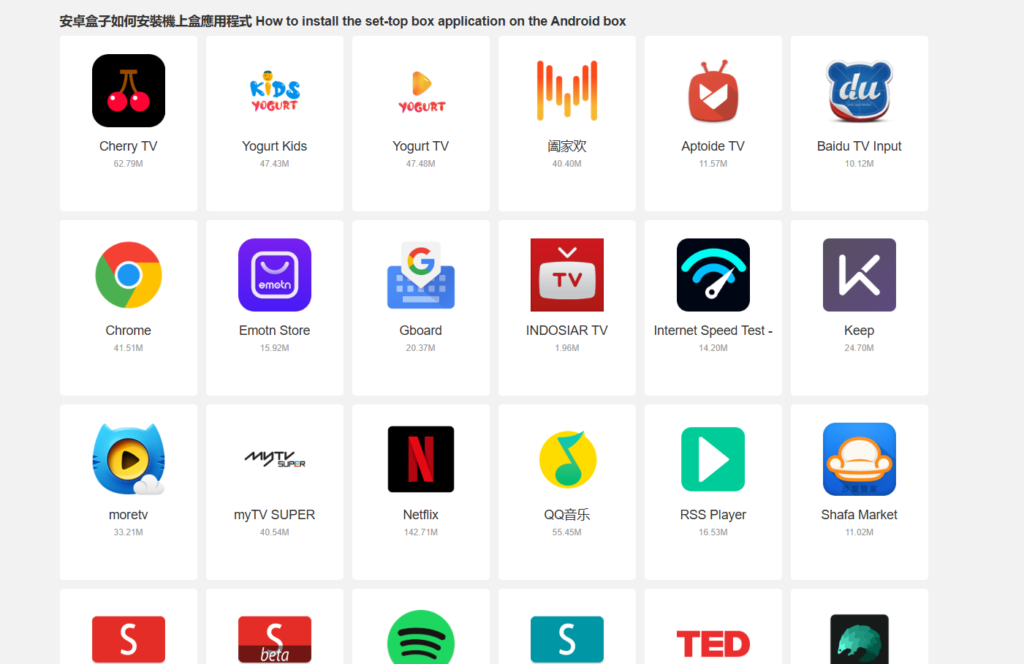
To download apps on the SviCloud 15P, go to the main page of the TV box and open Orz. Then enter the download website 8989c.cc in the address field. This will take you to the app download page, where you can browse and download the available applications to your SviCloud 15P.
For voice control, make sure the Bluetooth remote is properly paired, then press the microphone button and speak a supported search or command.
The SviCloud 15P also supports compatible screen-mirroring and casting methods. When required, connect your phone and SviCloud 15P to the same WiFi network before starting screen mirroring. For a closer look at the hardware, features, and overall capabilities, read our full SviCloud 15P review.
❗ Common SviCloud 15P Setup Problems
SviCloud 15P No Signal or No Picture
Check:
- Correct HDMI input
- HDMI cable
- Power connection
- Another HDMI port
The wrong TV input is often the cause.
SviCloud 15P WiFi Not Connecting
Try:
- Restarting the router
- Restarting the SviCloud 15P
- Checking both 2.4GHz and 5GHz networks
- Moving the box closer to the router
- Re-entering the WiFi password
- Testing Ethernet
SviCloud 15P Remote Not Working
Check the batteries first.
If the SviCloud 15P remote is not working correctly, move closer to the TV box and repeat the Bluetooth pairing process.
SviCloud 15P Voice Search Not Working
Voice control normally requires Bluetooth pairing. If the remote buttons work but voice search does not, check the Bluetooth connection and try pairing the remote again.
📋 SviCloud 15P Setup Checklist
Before finishing, confirm that:
- HDMI is connected correctly.
- The correct TV input is selected.
- Power is connected.
- Language and time zone are set.
- The SviCloud 15P remote is paired.
- WiFi or Ethernet is connected.
- Voice control works.
- Your preferred apps are ready.
Once these steps are complete, the SviCloud 15P TV Box is ready for everyday use.
💡 Final Thoughts
Setting up SviCloud 15P should take only a few minutes for most users. The process is straightforward:
Connect HDMI → Connect Power → Select HDMI Input → Pair Remote → Connect WiFi → Finish Setup
The SviCloud 15P TV Box keeps the familiar SviCloud setup process while adding a newer Android 14 platform, WiFi 6, Bluetooth 5.4, and an upgraded AI voice air-mouse remote. If you are upgrading from an older model, see our detailed SviCloud 15P vs SviCloud 10P comparison to understand what has changed between the two generations.
If the interface changes with future firmware updates, some menu names may look slightly different, but the basic SviCloud 15P installation process should remain largely the same.
❓ SviCloud 15P Setup FAQ
1. How do I set up the SviCloud 15P TV Box?
Connect the SviCloud 15P TV Box to your TV with HDMI, connect power, select the correct HDMI input, pair the remote, and connect to WiFi or Ethernet. Then follow the remaining on-screen instructions.
2. How do I connect SviCloud 15P to WiFi?
Open the WiFi or Network settings, choose your home network, enter the password, and select Connect. The SviCloud 15P supports 2.4 GHz, 5 GHz, and WiFi 6.
3. How do I pair the SviCloud 15P remote?
Keep the remote near the SviCloud 15P and follow the Bluetooth pairing instructions displayed on screen. Recent SviCloud remotes may use the VOL- and VOL+ buttons for pairing.
4. Can SviCloud 15P use Ethernet?
Yes. The SviCloud 15P TV Box includes Ethernet connectivity for users who prefer a wired network.
5. Why does my SviCloud 15P show No Signal?
First, check whether your television is using the correct HDMI input. If it is, reconnect the HDMI cable and power adapter or try another HDMI port.
6. Does SviCloud 15P support screen mirroring?
Yes. The SviCloud 15P TV Box supports compatible screen-casting and mirroring methods. The exact process may vary by phone, app, and firmware version.