

If you’re wondering about the svicloud tv box how to install procedure, setting up your new device doesn’t have to be a headache. The whole process involves three simple steps: connecting the HDMI and power cables to your TV, following the on-screen wizard to configure your Wi-Fi or Ethernet connection, and installing the streaming apps using the built-in “Orz” app or browser. You’ll find it typically takes about 5 to 10 minutes from unboxing to streaming your favorite channels.
Key Takeaways
- Easy Hardware Connection: Connect the Svicloud box via the included HDMI cable to your TV and power it up with the power adapter.
- Configure Internet Access: Connect to 5GHz Wi-Fi or use a wired Ethernet cable for the most stable, buffering-free streaming experience.
- Bluetooth Remote Pairing: Pair your voice control remote by pressing and holding the “VOL-” and “VOL+” keys simultaneously near the box.
- Install Streaming Apps: Launch the “Orz” browser app on the home screen and input the installation URL
8989c.ccto access Yogurt TV and other apps.- Quick Troubleshooting: Resolve blank screens by verifying HDMI sources, and fix remote issues by replacing AAA batteries and re-pairing.
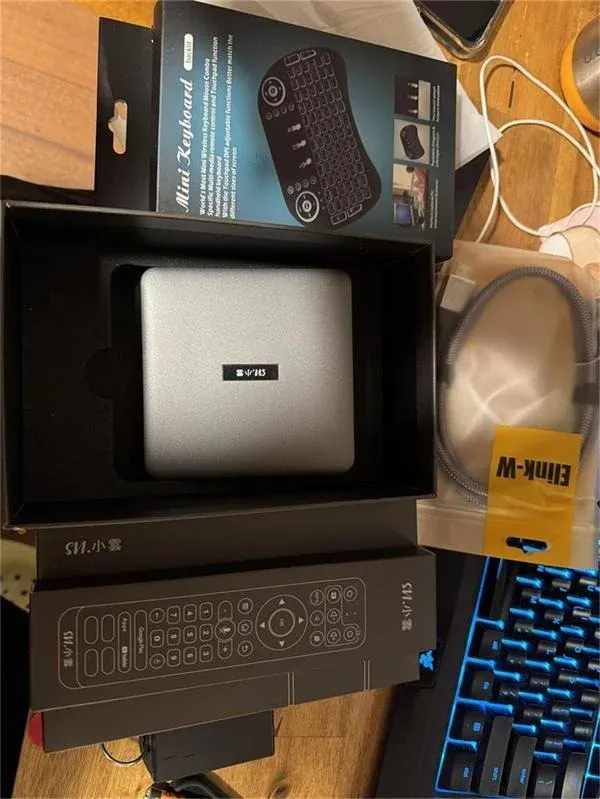
What Comes in the Svicloud TV Box?
Before you begin the installation process, it’s important to verify that you’ve got all the necessary components. Svicloud packages their devices with everything you need to get started immediately, so you won’t need to purchase extra cables.
Here’s the unboxing checklist of what should be inside your Svicloud TV box package:
| Component | Description | Purpose |
|---|---|---|
| Svicloud TV Box | The main Android media player unit. | Processes streaming data and outputs video/audio. |
| Power Adapter | Power supply unit with regional plug. | Provides electrical power to the TV box. |
| HDMI Cable | High-definition multimedia interface cable. | Connects the box to your TV screen. |
| Bluetooth Remote | Smart remote control with voice command capability. | Navigates the interface and accepts voice commands. |
| User Manual | Quick setup instruction booklet. | Provides diagrams and basic configuration steps. |
If any of these components are missing from your package, contact your retailer immediately before proceeding with the installation.

Hardware Installation: Connecting Svicloud to Your TV
The physical connection of your Svicloud TV box is the first phase of the setup. It doesn’t require any technical expertise and you can finish it in under three minutes.
Step 1: Connecting the HDMI Cable
First, locate the HDMI port on the back of your Svicloud TV box. Insert one end of the HDMI cable firmly into this port. Next, locate an available HDMI port on your television.
Insert the other end of the HDMI cable into the TV’s HDMI port. Note the label of the HDMI port you used (e.g., HDMI 1, HDMI 2, or HDMI 3), as you’ll need this information shortly.
Step 2: Connecting the Power Adapter
Take the power adapter and insert the small circular DC plug into the power input port on the back of the Svicloud box. Plug the other end of the power adapter into a wall outlet or power strip.
The Svicloud TV box doesn’t have a physical power switch; it’ll automatically turn on as soon as it receives power. A blue or red LED indicator light on the front panel of the box will illuminate, showing that the device is active.
Step 3: Selecting the Correct TV Input
Pick up your SviCloud remote control, and you will notice two power buttons on it. The green button is dedicated specifically to powering the TV box on and off, while the red button features a learning function that allows you to pair it with—and control—your actual TV set. Simply use them to power on both your TV and the box simultaneously!
Once it’s selected, you’ll see the Svicloud startup logo animation on your TV screen. If the screen’s still black, double-check that both ends of the HDMI cable are pushed all the way in.
Initial Setup: Configuring the Svicloud Wizard
Now that your Svicloud TV box is physically connected and displaying on your screen, you’ll go through the software setup wizard to configure the basic system settings.
Step 1: Language and Display Settings
The first screen of the setup wizard will ask you to select your preferred language. Svicloud supports English, Chinese, Malay, Japanese, Korean, and several other languages. Use the arrow keys on your remote to highlight your language and press the “OK” button to confirm.
After selecting the language, you’ll be prompted to adjust the screen zoom. If the edges of the user interface are cut off on your TV screen, use the volume or arrow keys on your remote to scale the display until the boundary lines align perfectly with the edges of your physical TV screen.
Step 2: Connecting to the Internet (Wi-Fi vs. Ethernet)
A fast and stable internet connection is vital for streaming high-definition content. You’ve got two options for connecting your Svicloud box to the internet: Wi-Fi or a wired Ethernet cable.
- Option A: Wireless Connection (Wi-Fi): Select your Wi-Fi network from the list of available networks shown on the screen. Enter your Wi-Fi password using the on-screen keyboard. For optimal performance, connect to a 5GHz Wi-Fi network rather than a 2.4GHz network. 5GHz provides much faster speeds and less interference, which prevents buffering.
- Option B: Wired Connection (Ethernet): Connect one end of a Category 5e or Category 6 Ethernet cable to your home router and the other end to the LAN port on the back of the Svicloud box. The box will automatically detect the connection, bypass the Wi-Fi setup, and configure the internet settings instantly.
Let’s look at Emma’s situation. In April 2026, Emma installed her new Svicloud 9S in her bedroom, which was about 30 feet away from the router. She initially connected via the 2.4GHz Wi-Fi band. During peak evening hours, she experienced severe buffering while trying to watch 4K streams.
After reading a troubleshooting guide, she purchased a flat 50-foot Ethernet cable and connected the box directly to her router. The buffering vanished instantly, and her download speeds jumped from 15 Mbps to 180 Mbps.
Whenever possible, choose a wired Ethernet connection for the absolute best streaming experience.
Step 3: Pairing the Bluetooth Voice Remote
Your Svicloud TV box comes with a Bluetooth remote control that supports voice search. However, when you first turn on the box, the remote operates in infrared mode. To use the voice search feature and control the box without pointing the remote directly at it, you must pair it via Bluetooth.
To pair the remote, perform the following steps:
- Move the remote control within 1 to 2 feet of the Svicloud TV box.
- Press and hold the Volume Down (VOL-) and Volume Up (VOL+) buttons simultaneously.
- Keep holding the buttons for 3 to 5 seconds until the indicator light on the remote begins to flash rapidly.
- The TV screen’ll display a pairing animation. Once the pairing is successful, the screen’ll show a “Connected” message.
If the pairing fails, verify that you’ve inserted two fresh AAA batteries into the remote, and try the process again.
Frequently Asked Questions (FAQ) for Svicloud Setup
Does the Svicloud TV box require a monthly subscription?
No. The Svicloud TV box’s a one-time purchase hardware device. Once you buy the box, you don’t need to pay any monthly or annual subscription fees to access the native Svicloud streaming applications like Yogurt TV or Yogurt VOD. However, standard subscription apps like Netflix, Prime Video, or Disney+ still require their respective active accounts.
What is the minimum internet speed needed for Svicloud?
For standard definition (SD) streaming, a speed of 5 Mbps is sufficient. For high definition (1080p HD) streaming, you’ll need at least 15 Mbps. If you plan to stream 4K Ultra HD content, we’d recommend a stable download speed of 25 Mbps or higher to avoid buffering.
How do I update the Svicloud applications?
Most native Svicloud apps like Yogurt TV’ll automatically check for updates when you launch them. If an update’s available, a prompt’ll appear on the screen asking for permission to update. Simply click “Update” and follow the on-screen instructions. Alternatively, you’ll visit the 8989c.cc website in the Orz browser to download the latest versions.